Let’s dive into the world of photo editing and make your pictures ‘Instagram-ready’. Whether you’re a seasoned photographer or just someone who loves sharing moments online, these tips will help enhance your photos.
Editing a photo is simple, whether you want to brighten the picture or crop off that careless photobomber in the corner. It’s not necessary to be an expert in photography. It only takes a few simple actions to improve your photographs in a matter of seconds.
How to Edit a Photo
When it comes to photo editing, choosing the right tool is crucial. However, due of its extensive feature set and toolkit, Adobe Photoshop is the primary choice for many people. Note that the monthly pricing of Photoshop is $22.99.
- Adobe Photoshop
- Industry Standard: Photoshop is a powerful and versatile software used by professionals worldwide.
- Advanced Features: It offers extensive editing capabilities, including layers, masks, and advanced retouching.
- Learning Curve: However, it has a steeper learning curve, especially for beginners.
2. Adobe Lightroom:
- Perfect for Photographers: Lightroom focuses on photo organization, color correction, and batch editing.
- Non-Destructive Editing: It’s great for enhancing raw images without altering the original files.
- Mobile Version: Lightroom Mobile is available for on-the-go editing.
3. Snapseed:
- Mobile Magic: Snapseed is a free mobile app (available for both Android and iOS).
- User-Friendly: It offers a wide range of tools, from basic adjustments to selective editing.
- Google’s Gem: Developed by Google, Snapseed is intuitive and efficient.
4. Canva:
- Online Platform: Canva is user-friendly and accessible via a web browser.
- Templates and Graphics: It’s not just for photo editing; Canva also provides templates for social media graphics, posters, and more.
- Great for Beginners: If you’re new to editing, Canva simplifies the process.
Let’s explore how to edit a photo:
Step 1: Choose File > Open to import your photo. Choose your image next.
Step 2: Choose Filter from the top menu and Camera Raw Filter to change the colour and vibrancy. To utilise the suggested edits provided by Photoshop, select Auto from the right-hand bar.
Manually adjust Exposure, Contrast, Highlights, and other settings to your taste.
Step 3: Use the C key or the Crop tool (found in the left-hand sidebar) to crop an image. Choose and modify the grid as necessary. The top menu bar also allows you to type in the required width and height.
By choosing the Straightening tool, you can also straighten a photo. Photoshop will automatically straighten the image to fit any lines you draw across it.
Step 4: Use the left-hand bar to pick Spot Healing in order to clean up an image. This might aid in removing the photo’s unsightly pixels, flaws, and spots.
Step 5: To choose a reference point and copy those referred pixels to another location, utilise the Clone Stamp tool, which is likewise located on the left-hand bar. This helps to add or remove small details from the picture.
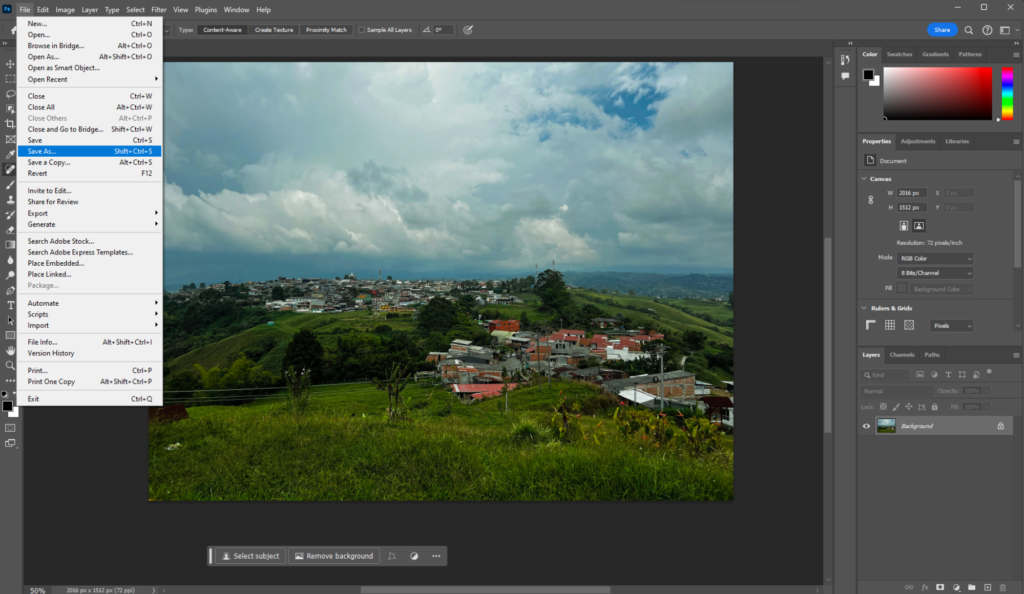
Step 6: Choose Save As under File. Next, you should decide if you want to save it via Adobe Creative Cloud or on your computer. The file will automatically save as a psd file if you save it to your PC.
Resizing and Optimizing your photos for Instagram
- Aspect Ratio Matters:
- Instagram thrives on square (1:1) and vertical (4:5 or 9:16) formats.
- For regular posts, aim for square or vertical compositions.
- Crop with Precision:
- Use photo editing tools to crop your image to the desired aspect ratio.
- Focus on the main subject while maintaining visual balance.
- Resolution and Quality:
- Instagram compresses images, so start with a high-resolution photo.
- Export your image at a quality level that balances clarity and file size.
- File Format:
- Save your image in JPEG format for optimal compatibility.
- Avoid PNG files unless transparency is necessary.
- Dimensions:
- Square posts: 1080 x 1080 pixels (or higher).
- Vertical posts: 1080 x 1350 pixels (or higher).
- Compress Smartly:
- Use compression tools or apps to reduce file size.
- Aim for a balance between quality and loading speed.
- Test Before Posting:
- Preview your resized image on your phone.
- Ensure it looks sharp and appealing.